Implementation process for FPGA
If file coding is finished, next we implement the design into FPGA.
As for the constraint for implementing, we prepare the
following file for the ATLYS board.
Save "kite_top.ucf" for user constraint file.
NET "CLOCK"    TNM_NET="CLOCK" ;
TIMESPEC "TS_CLOCK"=PERIOD "CLOCK" 100000 kHz ;
NET "CLOCK"    LOC="L15"    | IOSTANDARD=LVCMOS33;
NET "RESET"    TIG ;
NET "RESET"    LOC="T15"    | IOSTANDARD=LVCMOS33;
NET "TMDSP(0)" LOC, "D8"    | IOSTANDARD=TMDS_33; # Bllue
NET "TMDSN(0)" LOC, "C8"    | IOSTANDARD=TMDS_33;
NET "TMDSP(1)" LOC, "B8"    | IOSTANDARD=TMDS_33; # Red
NET "TMDSP(1)" LOC, "A8"    | IOSTANDARD=TMDS_33;
NET "TMDSP(2)" LOC, "C7"    | IOSTANDARD=TMDS_33; # Green
NET "TMDSN(2)" LOC, "A7"    | IOSTANDARD=TMDS_33;
NET "TMDSN(3)" LOC, "B6"    | IOSTANDARD=TMDS_33; # Clock
NET "TMDSN(3)" LOC, "A6"    | IOSTANDARD=TMDS_33;

INST "dviout/ioclk_buf" LOC="BUFPLL_X1Y4";
INST "pll/PLL_ADV_inst" LOC="PLL_ADV_X0Y3";
- It logs in to the machine (calc1 or calc2) for the implementing using ssh-the Y.
- It creates XXXX/kite01 as the working directory.
※ Directory may be where but the kite01 directory is composed of it
beforehand.
- It starts up ISE in the XXXX/kite01 directory.
ise &
-
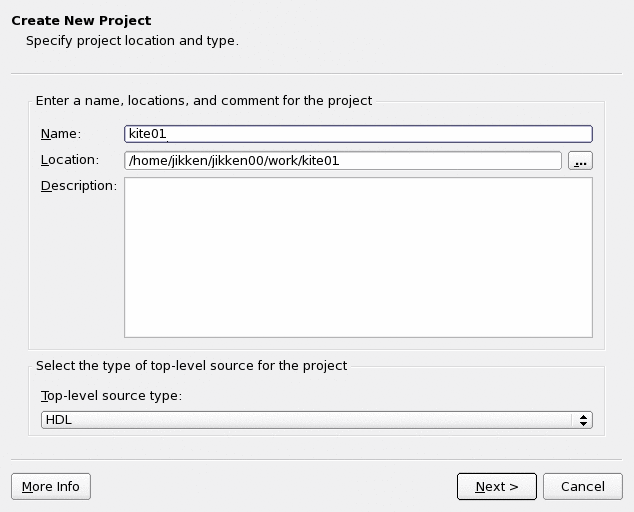
 It presses New Project.
- It creates Project.
It creates as it becomes the bottom of the ~/XXXX/imp directory as Location as it becomes kite01 as follows as Name.
Next, it presses Next.
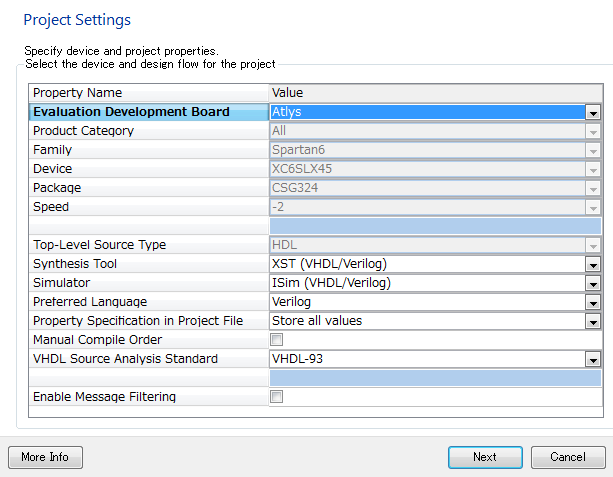
- It specifies FPGA, the design language to use in Device Propaties and it presses Next.
- Create New Source presses Next just as it is.
- It subscribes the following necessary file with Add Existing Sources and it presses Next.
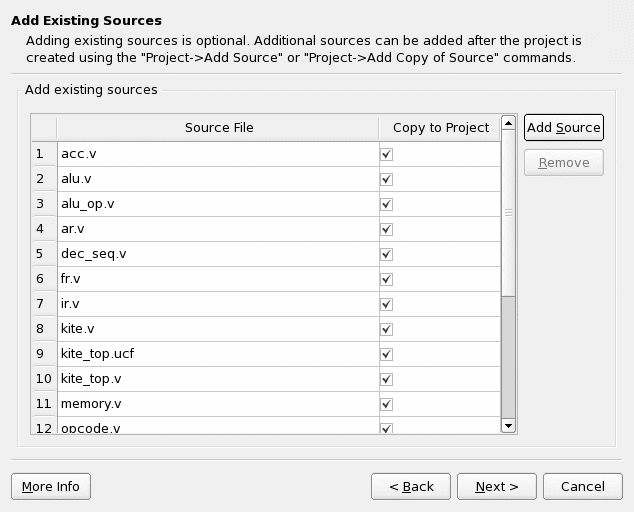
kite_top.v
kite.v
alu_op.v
alu.v
acc.v
ar.v
fr.v
ir.v
pc.v
r12. v
opcode.v
state.v
dec_seq.v
vram.v
memory.v
kite_top.ucf (The physical pin
allocation information)
dviout/DRAM16XN.v
dviout/convert_30to15_fifo.v
dviout/dvi_encoder.v
dviout/dvi_out_native.v dviout/encode.v dviout/serdes_n_to_1.v pll_module.vhd
- It confirms Project Summary and it presses Finish.
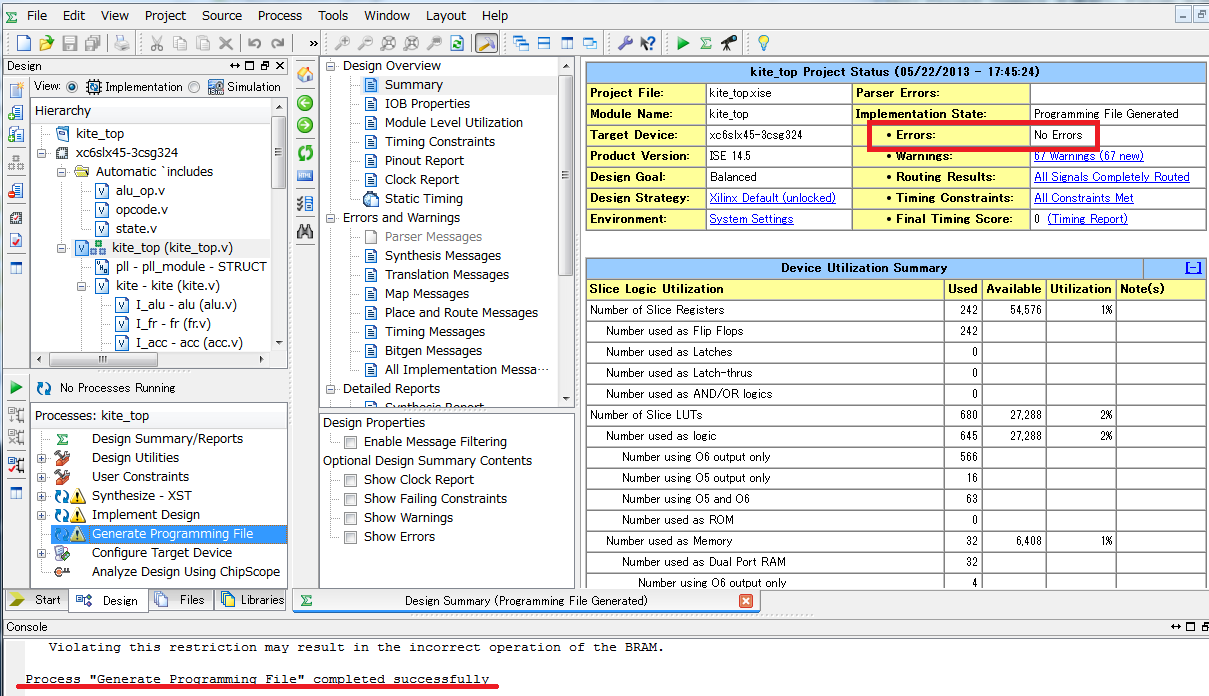
If there is not a problem, the preparation of the becoming logic synthesis completes in following screen.

- It copies a necessary * .ram file into the project directory (XXXX/kite01) beforehand.
If there is not a problem, the preparation of the becoming logic synthesis completes in following screen.
- It pushes the right button of the mouse in the place of Generate Program File of Process Window and it executes Run.
Logic synthesis XST, a technology mapping, arrangement, wiring, bit file production are executed by this.
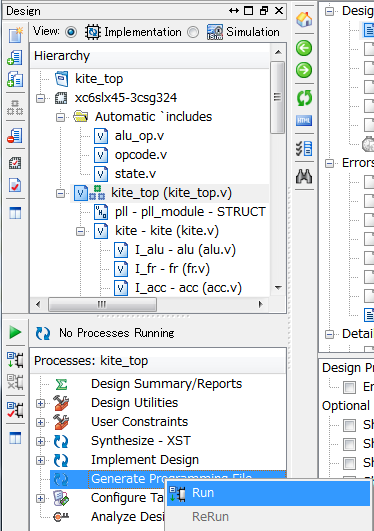
- Behind the logic synthesis, it becomes following screen.
| Back
|